Playing Pads
(30 minutes)
By default, most controllers (e.g. Minilab MkII) can be used for

- Finger drumming on a drum rack with the pads
- Controlling your synths parameters with the encoders.
Load one of the Drum Racks in Ableton Live. Your pads should be assigned to notes C1 onwards, and should be able to play the drum sounds in the Drum Rack.
- If you have less than 16 pads, you may need to shift octaves for your pads to play all the sounds in the Drum Rack
- If you have more than 16 pads, you can explore downloading Ableton Live Packs like 64 Pad Lab by Mad Zach https://www.ableton.com/en/packs/64-pad-lab/
Using Controllers as Control Surfaces
(30 minutes)

To use the Minilab MkII as an Ableton Live control surface, you have to:
(1) Select Minilab MkII in Ableton Live preferences > MIDI > Control Surface
(2) Set the Minilab MkII on the dedicated control surface memory (memory 8)
Then, here are the functions that will be mapped on your Minilab MkII when using the memory 8:
(1) Select Minilab MkII in Ableton Live preferences > MIDI > Control Surface
(2) Set the Minilab MkII on the dedicated control surface memory (memory 8)
Then, here are the functions that will be mapped on your Minilab MkII when using the memory 8:
CONTROL | MAPPING |
KNOB 1 KNOB 2 KNOB 3 KNOB 4 KNOB 5 KNOB 6 KNOB 7 KNOB 8 KNOB 9 KNOB 10 KNOB 11 KNOB 12 KNOB 13 KNOB 14 KNOB 15 KNOB 16 PAD 1 to 8 PAD 9 to 16 | LIVE – Device control LIVE – Device control LIVE – Device control LIVE – Device control Selected TRACK – control send A Selected TRACK – control send B LIVE – control RETURN A level LIVE – TRACK scroll left/right LIVE – Device control LIVE – Device control LIVE – Device control LIVE – Device control Selected TRACK – control PANNING Selected TRACK – control LEVEL LIVE – control RETURN B LEVEL LIVE – SCENE scroll up/down Control CLIPS first row Control CLIPS second row |
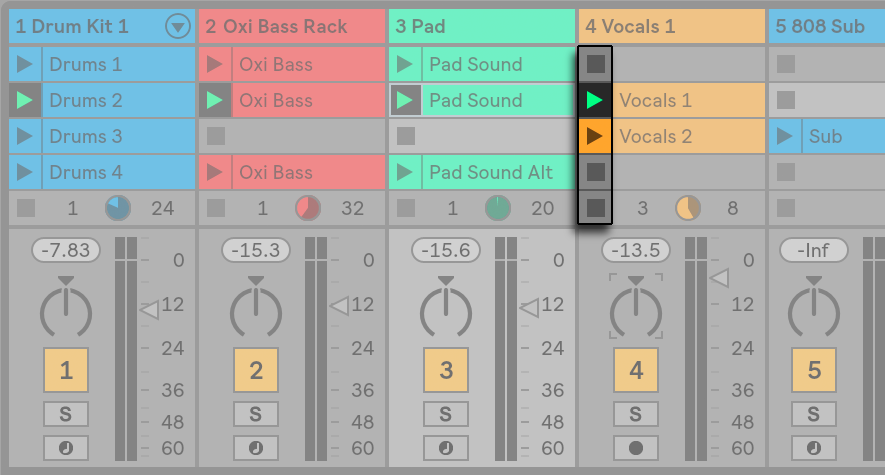
Session View - Launching Clips
- Launch a clip in the Session View using the triangular button at the left edge. Click the button with the mouse to “launch“ clip playback at any time, or pre-select a clip by clicking on its name, and launch it using the computer’s Enter key. You can then move on to the neighboring clips using the arrow keys.
- Stop using the square Clip Stop button
- Clips can be controlled remotely with the computer keyboard or a MIDI controller.
- Clips can be played at any time and in any order.
- Each vertical column, or track, can play only one clip at a time. So arrange sets of clips that are supposed to be played alternatively in the same columns: parts of a song, variations of a drum loop, etc.
- The horizontal rows are called scenes. The Scene Launch buttons are located in the rightmost column to launch every clip in a row simultaneously
- If Live detects a tempo as part of a scene name, the project will automatically adjust when the scene is launched (e.g., “96 BPM“)
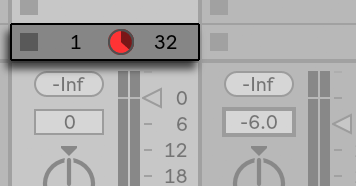
- You can tell a track’s status by looking at the Track Status field just above the active track’s mixer controls:
Comments
Post a Comment